






Introduction to the LAMP Stack
LAMP Stack is a group of open-source software commonly installed together so that a server can host websites and dynamic web applications written in PHP. The name is an acronym for Linux, the web server Apache, the database MySQL, and the server-side processing language PHP.
If you are new and want to deploy a server quickly, you can use a one-click installation service from a provider VPS. However, installing it yourself will help you understand the system configuration and give you more control during operation.
In this guide, you will set up the LAMP Stack on an Ubuntu 22.04 server. The commands for installing Apache, MySQL, and PHP use Ubuntu’s software repositories, so the exact versions may vary depending on the Ubuntu release, available updates, and when the commands are run. Ubuntu’s documentation is currently maintained for the latest LTS release, while noting differences from older LTS releases where necessary (according to the Ubuntu Server documentation).
Prerequisites
To complete this guide, you need an Ubuntu 22.04 server with a non- root root user account sudowith sudo privileges, along with a basic firewall. You can refer to the initial Ubuntu Server setup guide.
Log in via SSH using an account with sudo privileges sudo and update the package lists before you begin:
sudo apt update
sudo apt upgrade
Step 1 — Install Apache and Update the Firewall
Apache is a widely used web server on Linux. Ubuntu provides the apache2 package in the official software repository (according to ubuntu.com).
Install Apache with APT:
sudo apt install apache2When prompted for confirmation, enter Y Y ENTERand press Enter. Then, check the service status:
sudo systemctl status apache2If you are using UFW, list the available application profiles:
sudo ufw app listOutput
Available applications:
Apache
Apache Full
Apache Secure
OpenSSHMeaning of the UFW Profiles
- Apache: opens only port
80for HTTP. - Apache Full: opens ports
80and443for HTTP and HTTPS. - Apache Secure: opens only port
443for HTTPS.
If you have not configured a TLS certificate yet, you can allow only HTTP for initial testing:
sudo ufw allow in "Apache"
sudo ufw status
Once the website has a TLS certificate and needs to serve HTTPS, use the Apache Full configuration or open the HTTPS port according to your network design. Do not enable additional services unless necessary.
Open the server's public IP address in a browser:
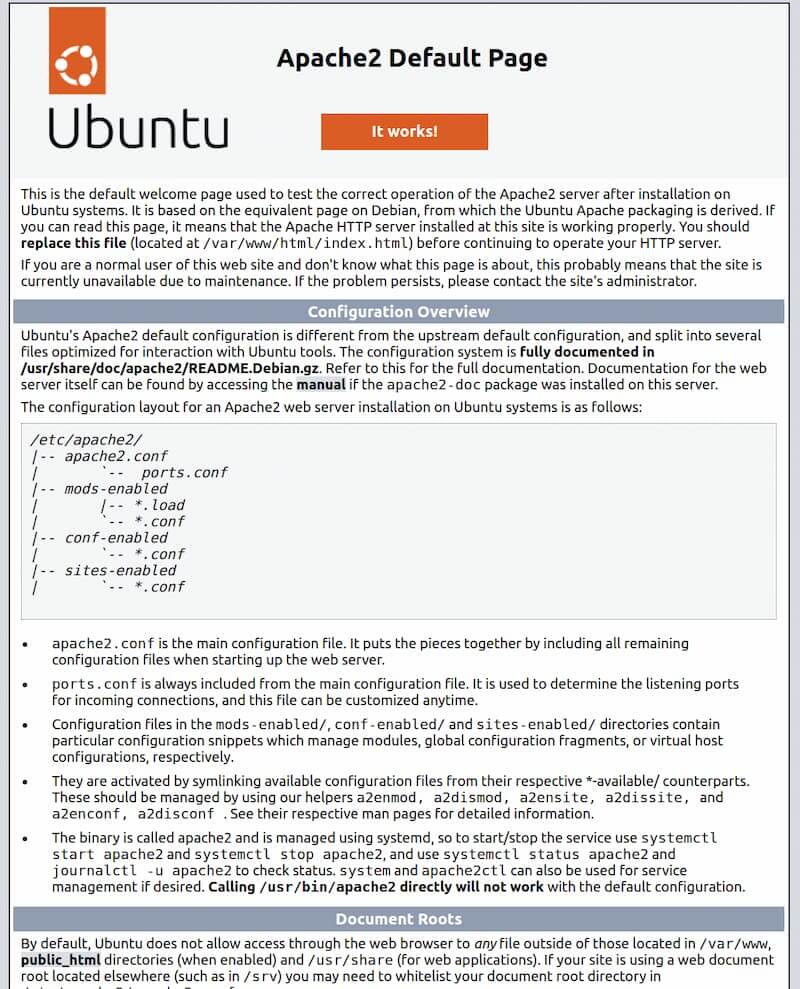
http://your_server_ipIf you see the default Apache page, the web server has been installed and is accessible through the firewall.
How to Find the Server's Public IP Address
Typically, this is the address used to connect via SSH. You can check the local network addresses with:
ip addrTo see the public address identified by an external service, you can use:
curl https://icanhazip.comIf the server is behind NAT or uses a cloud network, also check the Public IP address in the provider's control panel. Not every address shown in ip addr can be accessed directly from the Internet.
Step 2 — Install MySQL
MySQL handles data storage and management for the website. Install the MySQL server with:
sudo apt install mysql-serverThe service usually starts automatically after installation. Check its status with:
sudo systemctl status mysqlIf the service is not running, start it with:
sudo systemctl start mysqlOn Ubuntu, the default local MySQL account root locally typically authenticates through auth_socket. You can therefore access MySQL with:
sudo mysql -u rootDo not use the root account for applications. Ubuntu recommends creating a separate account with appropriate privileges for each database (according to the Ubuntu MySQL configuration documentation). Exit the MySQL interface:
exit;On some Ubuntu versions or MySQL packages, you can also run the interactive security checker:
sudo mysql_secure_installationThe questions and options may vary by version. Read each prompt carefully; you should generally remove anonymous accounts, restrict root from remote access and remove the test database if the system presents these options. Do not apply answers from older versions mechanically.
Create a separate MySQL database and account
The example below creates a separate database and user for the application. Replace the sample values with your own names and a strong password:
sudo mysql -u rootCREATE DATABASE app_db CHARACTER SET utf8mb4 COLLATE utf8mb4_unicode_ci;
CREATE USER 'app_user'@'localhost' IDENTIFIED WITH caching_sha2_password BY 'ThayBangMatKhauManh';
GRANT ALL PRIVILEGES ON app_db.* TO 'app_user'@'localhost';
EXIT;The example above uses the authentication method caching_sha2_password documented by Ubuntu. Choose a different method only when the application genuinely requires it and you have verified compatibility (according to the Ubuntu MySQL account documentation).
The MySQL server is now installed and basically configured. Next, install PHP.
Step 3 — Install PHP
Apache delivers content, MySQL stores data, and PHP processes dynamic code. To enable Apache to run PHP and PHP to connect to MySQL, install the required packages:
sudo apt install php libapache2-mod-php php-mysqlUbuntu provides the php, the PHP module for Apache, and php-mysql in the software repository. After installation, check the actual PHP version with:
php -vDo not hard-code a specific version in the guide, because the version depends on the Ubuntu release, available updates, and the time of installation. As of the article update on September 2, 2026, PHP 8.5 and PHP 8.4 remained supported branches; PHP 8.3 will receive security fixes only through December 31, 2027, while PHP 8.2 will receive them through December 31, 2026 (according to the PHP.net). Prefer the version provided by the Ubuntu repository and verify application compatibility.
Restart Apache to ensure that the new module and configuration are loaded:
sudo systemctl restart apache2Step 4 — Create a Virtual Host for the Website
Apache allows you to create multiple Virtual Hosts to host multiple domains on the same server. In this example, replace your_domain with your actual domain name and ensure that the DNS record points to the server's IP address.
You can also view the guide to pointing a domain to a server.
Instead of using the default directory directly, /var/www/htmlcreate a separate directory for the website:
sudo mkdir -p /var/www/your_domain
sudo chown -R "$USER":"$USER" /var/www/your_domain
Create the Virtual Host configuration file:
sudo nano /etc/apache2/sites-available/your_domain.confAdd the following basic configuration:
<VirtualHost *:80>
    ServerName your_domain
    ServerAlias www.your_domain
    ServerAdmin webmaster@localhost
    DocumentRoot /var/www/your_domain

    <Directory /var/www/your_domain>
        AllowOverride All
        Require all granted
    </Directory>

    ErrorLog ${APACHE_LOG_DIR}/your_domain_error.log
    CustomLog ${APACHE_LOG_DIR}/your_domain_access.log combined
</VirtualHost>
Save the file and exit nano with CTRL+X, press Y and ENTER. Enable only AllowOverride All if you need to use the .htaccess; otherwise, use a more restrictive configuration.
Enable the Virtual Host, check the syntax, and reload Apache:
sudo a2ensite your_domain.conf
sudo apache2ctl configtest
sudo systemctl reload apache2
If you do not need Apache's default page, you can disable the default site:
sudo a2dissite 000-default.conf
sudo apache2ctl configtest
sudo systemctl reload apache2
If you do not yet have a domain name, keep the default site or create a separate test configuration. When using a real domain name, check DNS and open the correct ports on the firewall before accessing it.
Step 5 — Test PHP with Apache
Create a PHP test file in the website directory:
nano /var/www/your_domain/info.php<?php
phpinfo();Open http://your_domain/info.php in a browser. If the PHP information page appears, Apache has successfully processed the PHP file.
After testing, delete this file because it displays extensive configuration information that could help attackers:
rm /var/www/your_domain/info.phpStep 6 — Next Steps
- Configure HTTPS with a valid TLS certificate before putting the website into production.
- Open only the ports required on UFW, and do not allow MySQL access from the Internet unless the application requires it.
- Use a separate MySQL account for each application, with the minimum permissions required.
- Set up database backups and periodically test your ability to restore them.
- Update Ubuntu, Apache, MySQL, and PHP according to your maintenance procedures.
You have completed the core components of the LAMP Stack on Ubuntu: Apache serves the website, MySQL manages data, and PHP processes dynamic content.
Reference source
